Litigated Case Prep: Timeline From Intake to Trial Themes
.png)

Litigation rarely fails because a lawyer “didn’t work hard.” It fails because the case story is built too late, key facts are buried in documents, and deadlines force reactive decisions.
A tight litigated case prep timeline fixes that. The goal is simple: move from raw intake materials to a provable theory of liability and damages, then to clear trial themes, without losing time to re-reading, re-summarizing, or re-formatting.
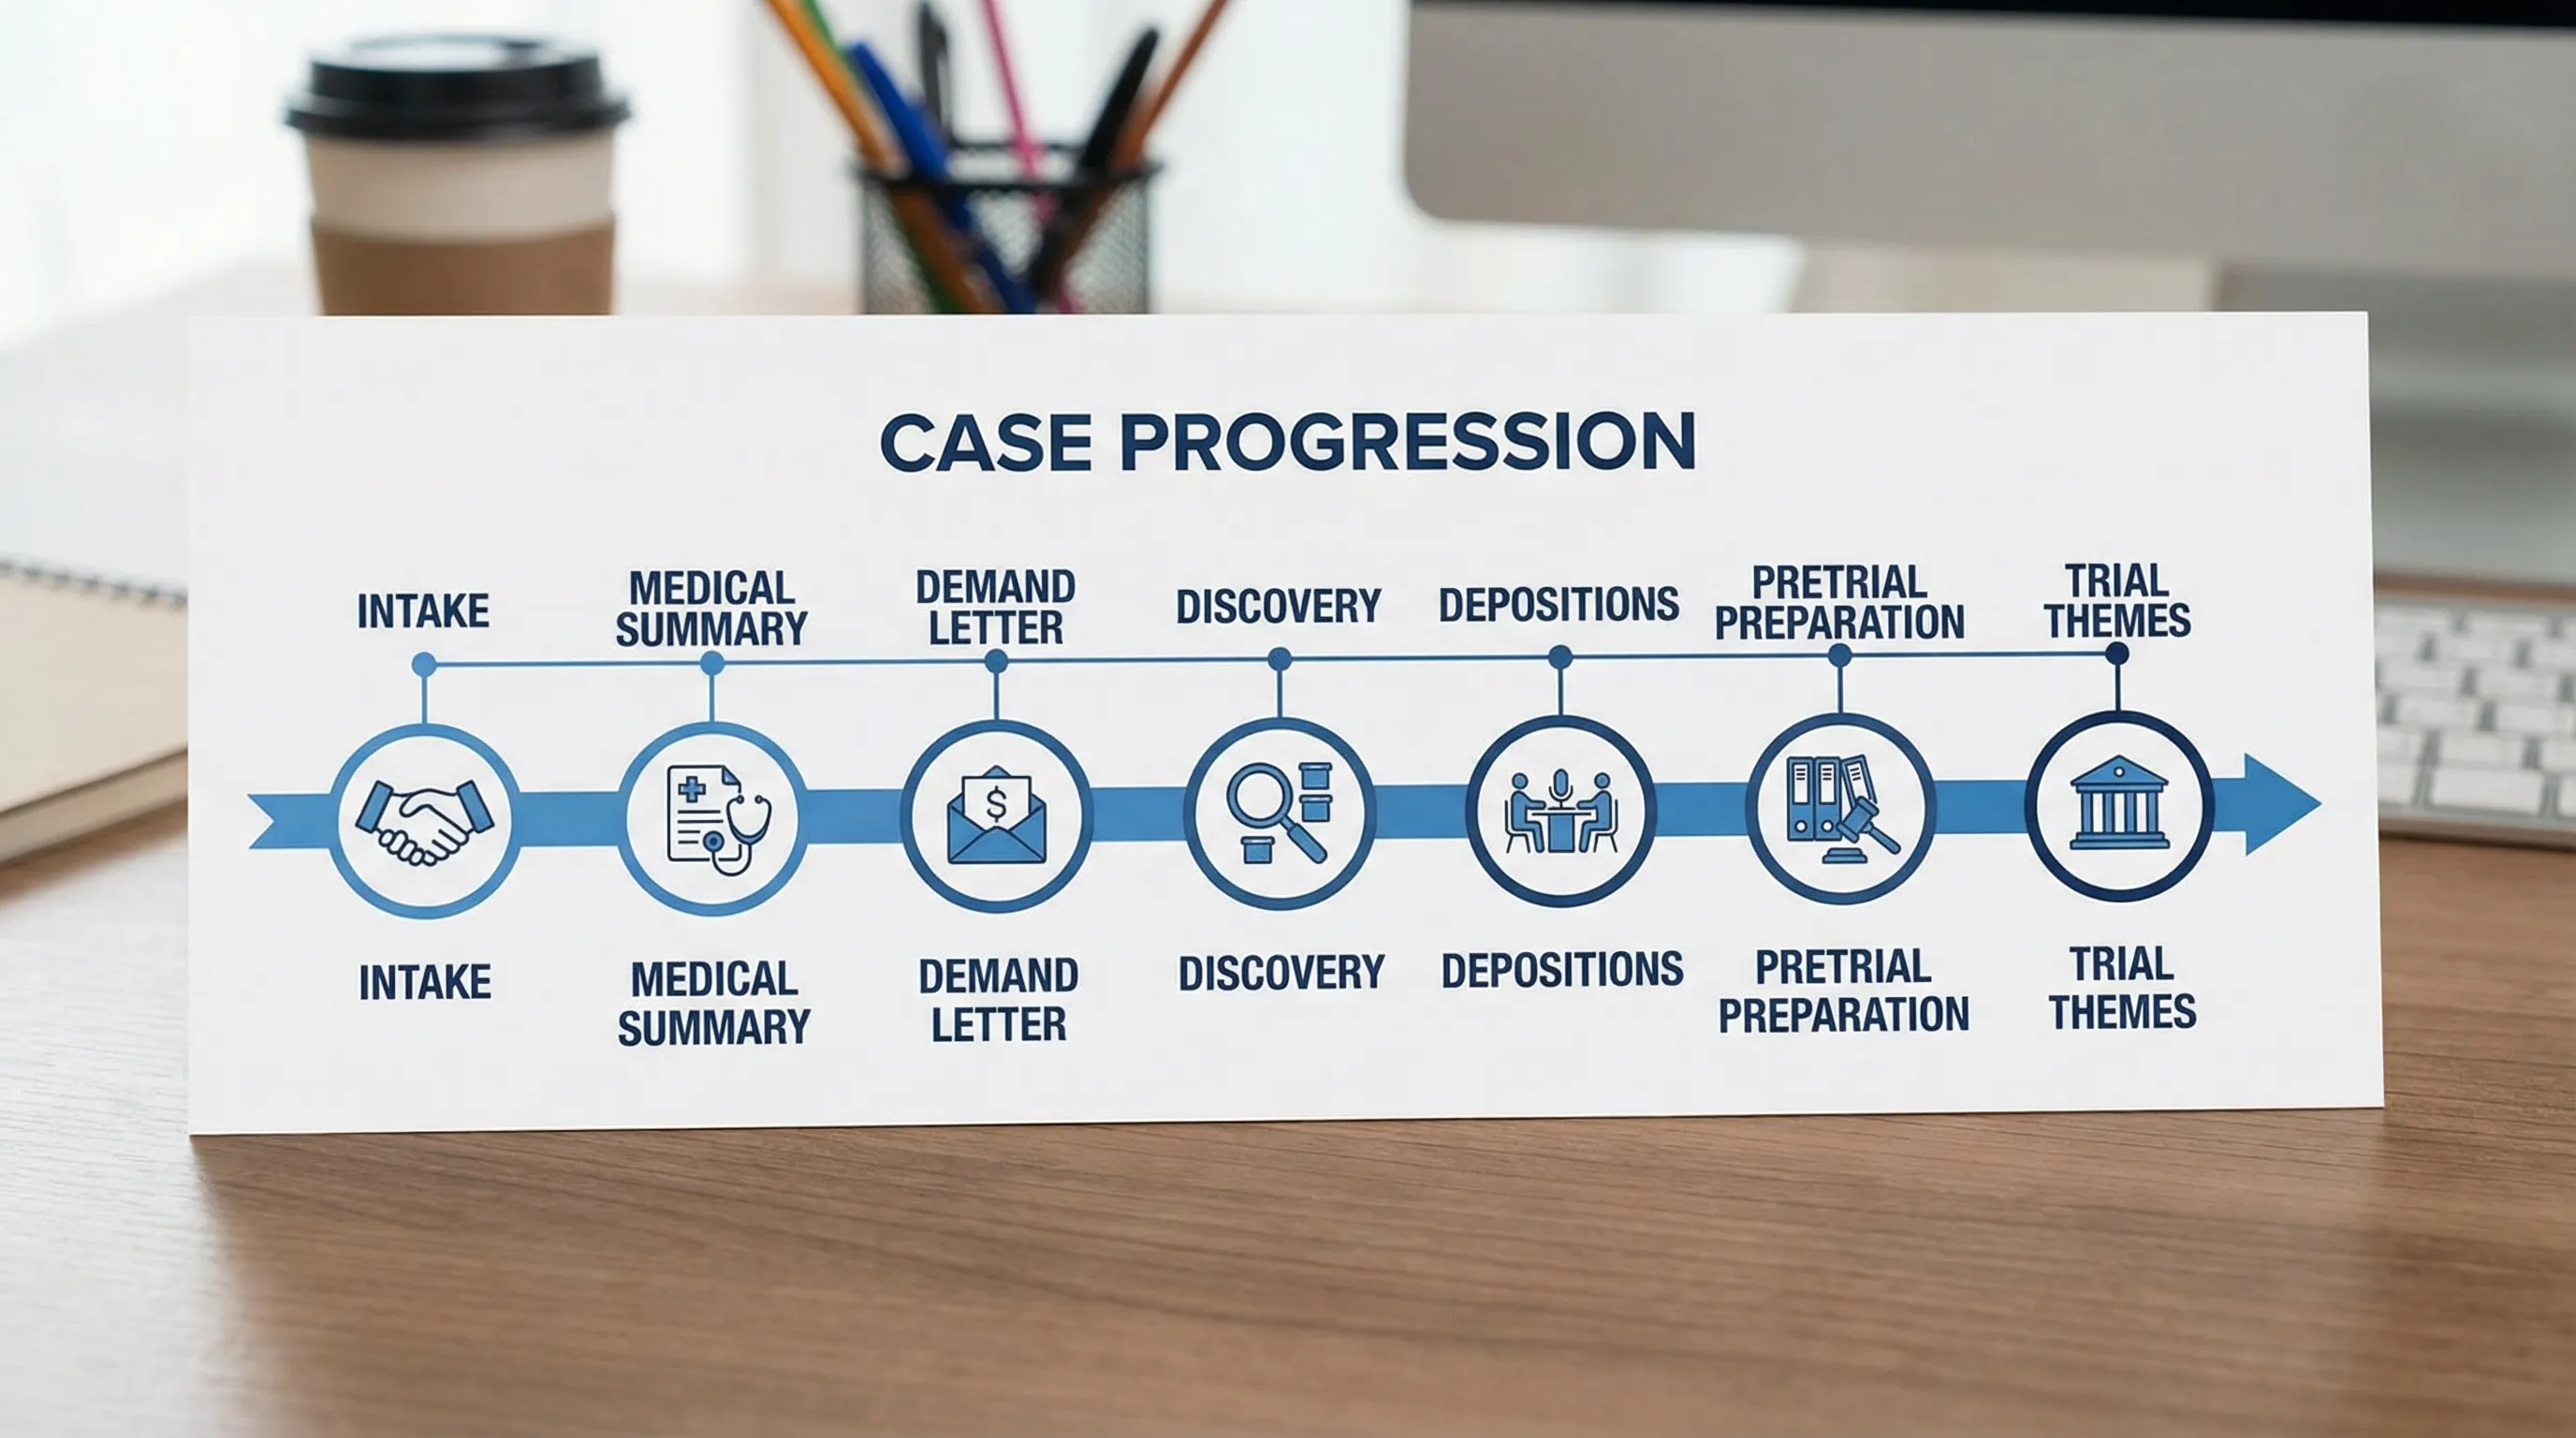
At-a-glance timeline (intake to trial themes)
This timeline varies by jurisdiction, case type, and scheduling order, but the workflow holds across most civil matters.
| Phase | Typical window | Primary objective | Core work product |
|---|---|---|---|
| Intake and triage | Days 0 to 7 | Validate the claim, preserve evidence, and identify gaps | Initial case map + document request plan |
| Early case build | Weeks 1 to 4 | Turn records into a settlement-ready narrative | Medical summary + damages snapshot |
| Demand and negotiation posture | Weeks 2 to 6 | Put a number and a story on paper | Demand letter + exhibits |
| Pleadings and case plan | Month 1 to 2 | Align claims/defenses with what you can prove | Complaint/answer support + disclosure plan |
| Discovery engine | Month 2 to 9+ | Extract admissions and lock testimony | Written discovery sets + depo outlines |
| Pretrial and trial themes | Final 90 to 30 days | Convert proof into persuasion | Trial themes + witness/exhibit organization |
Phase 1 (Days 0 to 7): Intake, triage, and the “first case story”
In the first week, you are not trying to “fully understand” the case. You are trying to prevent early mistakes that are expensive later.
Focus on:
- Theory check: What must be proven, and what is currently missing?
- Damages reality check: What categories exist (medical, wage loss, future care, pain and suffering), and what documents support each?
- Time sensitivity: SOL, notice requirements, spoliation risk, surveillance and scene changes.
- Document plan: What to request first so your narrative is anchored in objective records.
Where AI helps: uploading a messy set of PDFs (incident reports, ER notes, photos, prior claims) and generating a structured starting point, including a chronology and issue list, so the team can triage faster and assign follow-ups.
Phase 2 (Weeks 1 to 4): Build the facts into usable litigation outputs
Most litigated case prep breaks down here because “review” stays trapped in heads and highlights, instead of turning into reusable work product.
Two outputs matter early:
A medical summary you can trust
A good medical summary is more than a recap. It should capture dates of service, diagnoses, treatment progression, causation-relevant notes, and inconsistencies (prior similar complaints, gaps in care, alternative explanations).
A liability and damages snapshot
This is the working draft of your case story. It is not final, but it should be concrete enough to guide pleadings, early negotiation posture, and discovery targets.
Where AI helps: producing a first-pass medical summary and case narrative quickly, then letting attorneys verify, edit, and cite to the record rather than starting from a blank page.
Phase 3 (Weeks 2 to 6): Demand package (even if you expect litigation)
Even when a case is likely to be litigated, a disciplined demand package pays off because it forces clarity:
- What is the best liability framing supported by admissible evidence?
- What are the damages with documentation attached?
- What are the predictable defense themes, and how do you preempt them?
Where AI helps: drafting an organized demand letter and attaching a coherent exhibit set based on the documents you uploaded, reducing the time spent reformatting and re-stating the same facts.
Phase 4 (Month 1 to 2): Pleadings, disclosures, and your discovery blueprint
Once suit is filed (or while it is imminent), your job is to align claims and defenses with what you can actually prove.
Practical checkpoints:
- Pleadings support: allegations that match record facts and preserve key theories.
- Disclosure and planning discipline: build a discovery plan around what you must establish and what the other side must admit.
- Deadlines: anchor everything to the scheduling order and procedural requirements (for example, see Rule 26 for federal disclosure and discovery framework).
Where AI helps: keeping pleadings-adjacent summaries, chronologies, and issue lists consistent as new documents arrive, so you are not “rewriting the case” every time.
Phase 5 (Month 2 to 9+): Discovery that feeds depositions (not binders)
Discovery should not be a warehouse. It should be a pipeline that ends in deposition questions, admissions, and trial-ready proof.
Key work products:
Written discovery with purpose
Draft interrogatories and requests that map to elements of claims and defenses, then use responses to identify deposition targets and authentication needs.
Deposition outlines built from the record
Effective outlines connect:
- what the witness must admit,
- the documents that support each point,
- the “escape routes” the witness will try.
Where AI helps: generating deposition outlines from your uploaded discovery, medical records, and key correspondence, so you can spend attorney time on strategy, sequencing, and impeachment, not on hunting for dates.
Phase 6 (Final 90 to 30 days): Trial themes, witness arcs, and exhibit control
Trial themes are not slogans. They are the shortest truthful explanation of why you should win.
A reliable way to get there is to build three layers:
- Theme: the moral of the case (what the jury should believe).
- Proof: the 8 to 12 facts that make the theme unavoidable.
- Structure: witnesses and exhibits ordered to make those facts land.
This is also when operational mistakes get expensive. Experts, transcripts, trial tech, demonstratives, and vendor costs can spike fast, so many teams track spend in a separate tool or dashboard. If you want a simple way to monitor litigation-related out-of-pocket costs alongside office cash flow, a budgeting dashboard for tracking expenses can help keep surprises down.
Where AI helps: turning the same document set into trial-facing materials (theme-driven summaries, exhibit lists, witness prep packets) without redoing foundational work.
Frequently Asked Questions
When should trial themes be developed in a litigated case? Start testing themes during intake (as hypotheses), refine them after early medical and liability summaries, and finalize them in the last 90 days when deposition testimony and expert positions are locked.
What documents should be prioritized right after intake? Anything that anchors time, mechanism, and injury: incident reports, initial medical records, key photos/video, witness identifiers, and insurance/coverage information.
How do you keep a medical summary accurate when new records keep arriving? Treat the summary as a living work product with clear sourcing (date of service, provider, page cite). Update on a cadence (weekly or biweekly) and reconcile contradictions explicitly.
When is the best time to draft deposition outlines? As soon as you have enough documents to define the admissions you need, typically after initial written discovery responses and core record collection, then revise again after receiving late productions.
How do teams avoid version-control chaos across summaries, demands, and outlines? Use a unified workflow where updates to the document set flow into consistent outputs, and where collaboration happens in one place rather than across disconnected files.
Bring the timeline into one workflow
If you want to move faster from intake to trial themes without sacrificing accuracy, TrialBase AI is built for litigated case prep. Upload your documents and generate litigation-ready outputs like demand letters, medical summaries, deposition outlines, and trial materials in minutes, then collaborate with your team in a unified workspace.